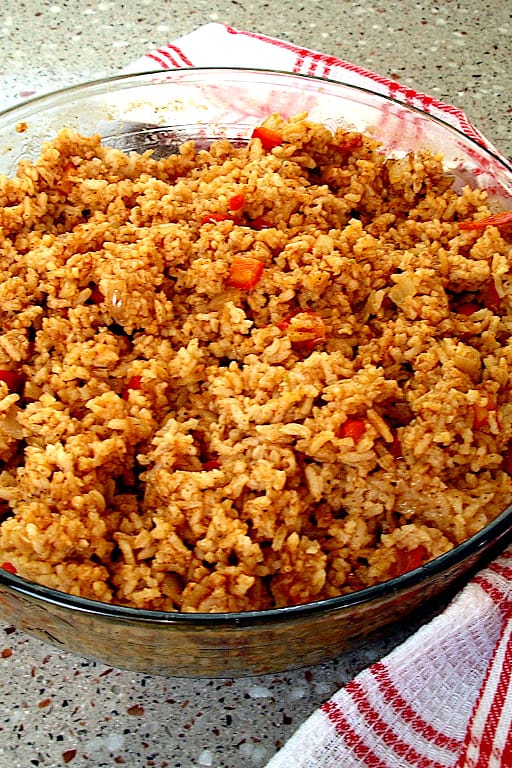
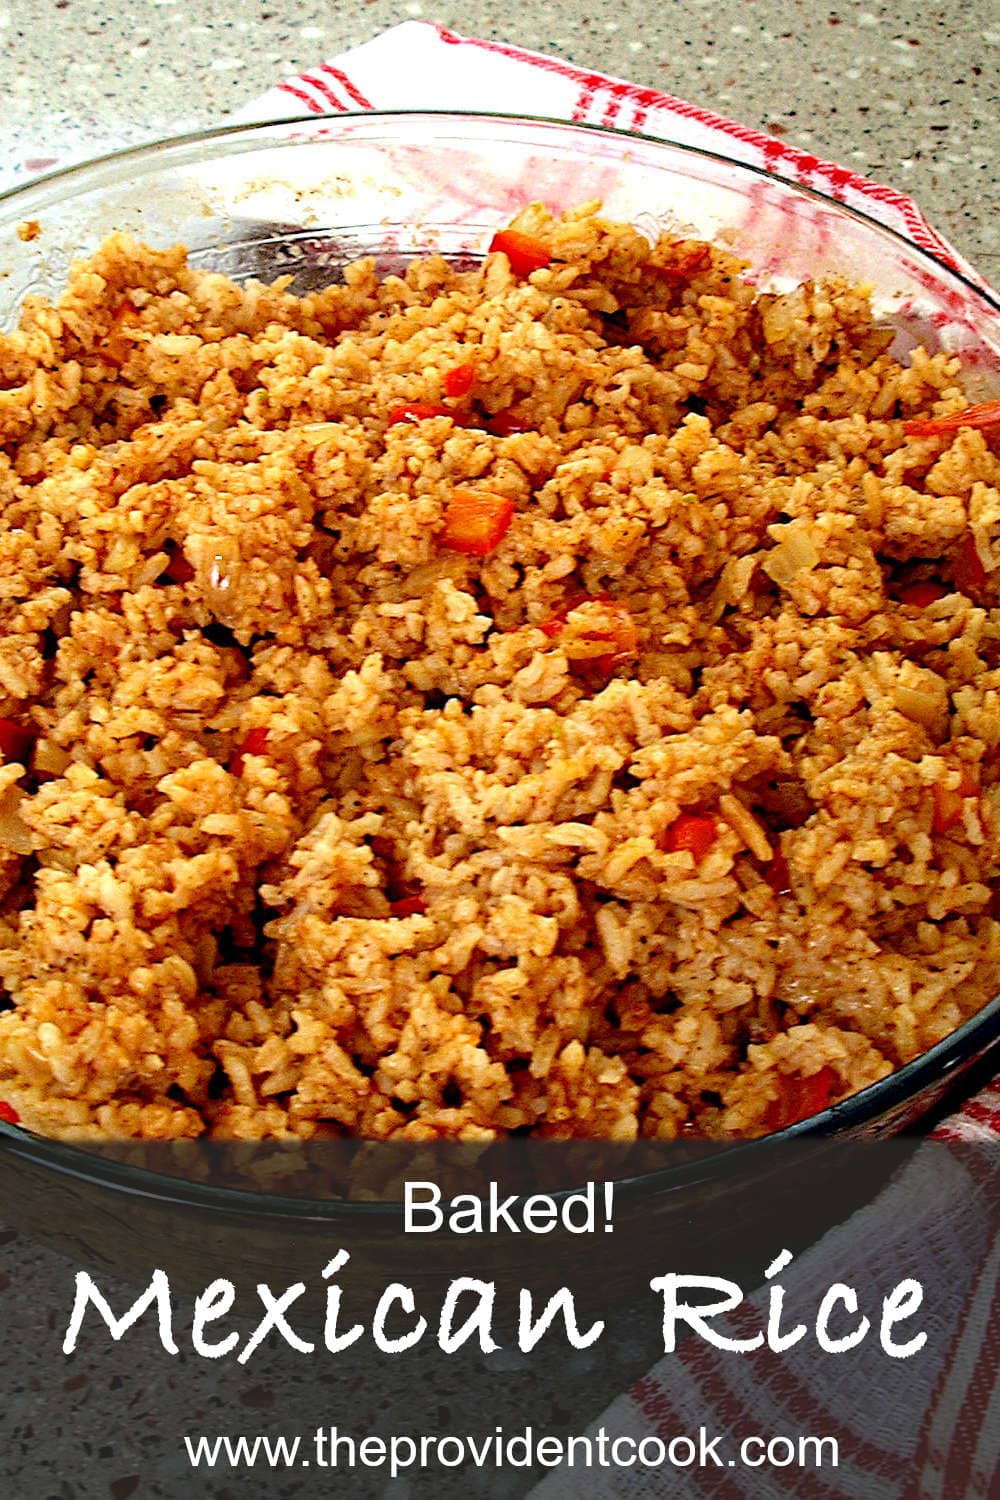
Baked Mexican Rice easily feeds a crowd, or works as a lunch-prep side dish throughout the week. Richly flavored and fluffy, it’s far better than what you find in the average Mexican restaurant.
When this recipe was originally given to me, my friend Josie said it had been handed down through her family for several generations. Her parents had immigrated from Michoacán, Mexico around the turn of the last century. So this recipe for baked Mexican rice has been around for a very long time! I made this recipe often, until (OMG!) I managed to lose it in one of my many moves. (This was way before I started using MasterCook.) But then, I found a recipe that was something close to it, and I was able to re-create it. Whew!
There’s really no comparison between this recipe and the “Mexican rice” I’ve had in various restaurants here in the Midwest and elsewhere. The restaurants seem to always use converted rice. I get why they do this, converted rice can be held at serving temperature for a very long time without disintegrating. But there’s also this weird thing where they add frozen peas and carrots to their rice. Whaaaat? And there are virtually no spices, so to me it tastes kinda like the cardboard box the rice came in.
About Baked Mexican Rice
This recipe for baked Mexican rice is richly savory with chicken broth and tomato sauce, and just enough spices to flavor it nicely without making it too spicy. I mentioned that this recipe feeds a crowd, didn’t I? It makes at least 10 servings! Which makes it ideal if you’re hosting taco night at your house, or having a cook-out featuring fajitas or other Mexican main dishes. And since the oven does most of the work, it lets you focus on the important things, like guests and margaritas!
Start by chopping and mincing the veggies for this dish, then rinse the rice until the water runs clear. Rinsing is really important here – the milling process leaves a little bit of a starchy residue on the rice grains. If you don’t remove it by rinsing, the starch tends to make the finished rice a bit gummy. Here I’m using a fine-meshed strainer to rinse the rice. You can also just put the rice in a bowl, add water to an inch or two above the rice, and swirl it around. Then drain the bowl carefully, using your cupped hand to catch any stray rice kernels. Repeat until the water is mostly clear.

Then heat a little cooking oil in a 12-inch skillet, add the rice, and stir occasionally until the rice kernels turn opaque and start to turn a bit golden.

Turn the rice into a 2½-quart baking dish, add a little more oil to the pan, then add the onions, bell pepper (if using) and garlic. Saute for about 5 minutes until the onion is translucent. Add the vegetables to the baking dish.
A Very Important Step
Now, this next step might seem unnecessary, but trust me on this – you need to bring the liquids and spices to a boil before adding to the rice mixture. I’ve tried skipping this step, and it was a disaster. Gummy, undercooked rice is not a happy thing!! So bring the liquids to a full boil, add it to the rice mixture, cover, and bake for 40 to 45 minutes or until the rice is tender.
When it comes out of the oven, the tomato solids and vegetables will have congregated in the center top of the dish. Using a fork, stir and fluff the rice to incorporate these flavors throughout the baking dish.

Baked Mexican Rice – for a Crowd

Baked Mexican Rice easily feeds a crowd, or works as a lunch-prep side dish throughout the week. Richly flavored and fluffy!
- Prep Time: 30
- Cook Time: 45
- Total Time: 1 hour 15 minutes
- Yield: 10 servings 1x
- Category: side dish
- Method: baking
- Cuisine: Mexican
Ingredients
2 – 3 tablespoons olive oil, divided use
1 large onion, chopped (about 1 cup)
1 red or green bell pepper, chopped (optional)
1 clove garlic, minced (about 1 teaspoon)
2 cups long-grain rice
1 teaspoon salt
1/8 teaspoon ground black pepper
2 teaspoons chili powder
1/4 teaspoon ground cumin
2 1/2 cups chicken broth (20 ounces)
1 cup tomato sauce (8 ounces)
2 cups water
Instructions
Chop the onion and bell pepper (if using) and mince the garlic. Set aside.
Preheat the oven to 350°. Add the rice to a fine-mesh strainer and rinse under cold running water until the water runs clear. Or, add the rice to a medium-sized bowl, add cold water nearly to the brim, swish and carefully drain off the water, using your cupped hand to catch any stray grains of rice. Repeat until the water is clear.
Heat a 12-inch skillet over medium heat, and add a tablespoon of olive oil. Add the rinsed rice and stir to coat the grains with oil. (It may clump at first due to the water remaining in it. Break it up with a spoon or spatula until the rice grains are separated.) Continue to cook, stirring occasionally, until the rice starts to turn opaque and a little bit golden. Pour and scrape the rice into a 2½-quart casserole.
Add another tablespoon of oil to the skillet and add the onion, garlic, and bell pepper (if using). Saute over medium heat until the onion is translucent and the bell pepper begins to soften. Add the mixture to the rice in the baking dish.
Add the spices to the skillet and saute for just a minute, or until they become fragrant. Add the chicken broth, tomato sauce and water, and bring to a boil. Add the liquid mixture to the baking dish and stir to mix all ingredients evenly.
Cover the baking dish tightly with a lid or foil, and carefully transfer it to the middle rack of the oven. Bake for 40 to 45 minutes, or until the rice is tender. Remove from the oven, uncover and fluff and stir with a fork to distribute the tomato solids and vegetables before serving.
Great recipe! I’ve made it twice with no changes to the recipe. It came out delicious both times. It’s definitely a keeper!
★★★★★
Thank you, Virginia! It has been a favorite of ours for many years! So happy you liked it.